SLATZ ®
FOR VINYL APPLIED GRAPHICS
FOR VINYL APPLIED GRAPHICS
SLATZ®
FOR VINYL APPLIED GRAPHICS
FOR VINYL APPLIED GRAPHICS
THE SLATZ® SIGN SYSTEM PROVIDES VERSATILE AND ADAPTABLE SOLUTIONS FOR INTERIOR COMMUNICATIONS.
Coordinate with a comprehensive wayfinding system that begins outside a building or be the first signs that greet people for an individual department or business inside a complex.
The SLATZ® Sign System provides versatile and adaptable solutions for interior communications. Using the same basic building blocks of universal clips and end caps, along with faceplates in a variety of sizes and finishes, you can create a coordinated sign program that works on its own or interface with standard or custom signage.
Identify destination areas and departments on a centralized, wall-mounted directory available in single and multi-column configurations. Reinforce the directions with wall-mounted and/or ceiling-hung directionals. Specify departments, personnel, restrooms and other special-use rooms with ADA compatible door-side identification signs and/or projected room numbers.
SINGLE PANEL
Extrusions can be cut to any length – long or short –
for single-panel signs.
MULTIPLE PANELS & COLUMNS
Flexible components assure
unlimited configurations.
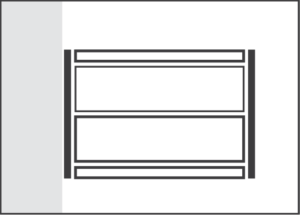
CUSTOM PANELS
Custom-size panels integrate with the system and enhance design capabilities.
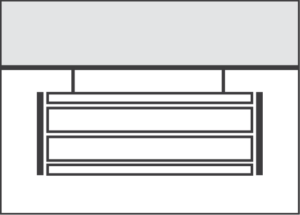
SUSPENDED PANEL
Overhead options maximize visibility in difficult areas.
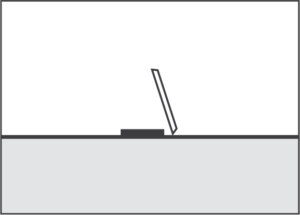
PROJECTING PANEL
SIDETRACK SYSTEM
Sidetrack extrusions ensure panel alignment and conceal edges. Available for all panel options.
SUSPENDED PANEL
Overhead options maximize visibility in difficult areas.
PROJECTING PANEL
SIDETRACK SYSTEM
Sidetrack extrusions ensure panel alignment and conceal edges. Available for all panel options.
FEATURES
Custom Panel Sizes to match specific needs
Tamper Resistant
FEATURES
Custom Panel Sizes to match specific needs
Tamper Resistant
-

- Wall Sign
-
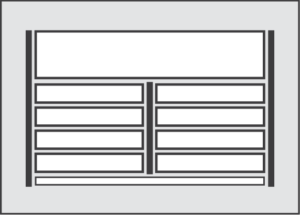
- Multi-column Directory
-
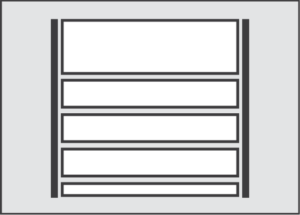
- Single-column Directory
-
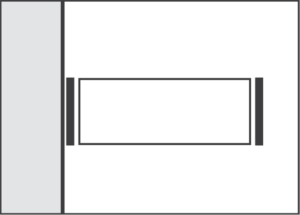
- Projecting Sign
-
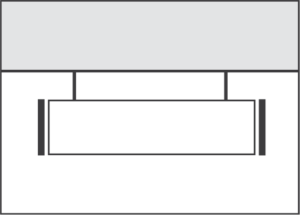
- Suspended Sign
-
- Desk Sign
-
- Suspended Directory
-
- Projecting Directory
Single-panel (Type A)
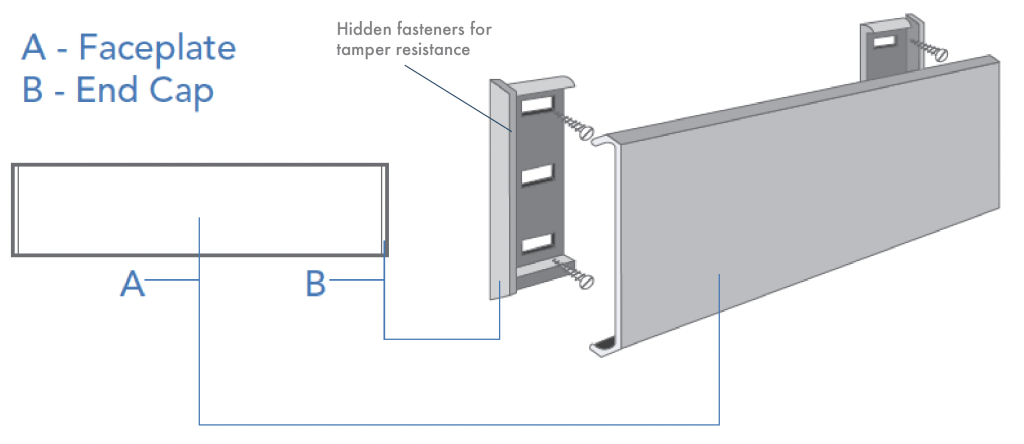
The Slatz end cap does dual duty as a mounting bracket and finishing feature.
Available in sizes to fit each Slatz faceplate extrusion, the caps are used to mount single-panel signs.
They are ideal for nameplates, desk signs, restrooms and single-message communication.
Multi-panel (Type B)
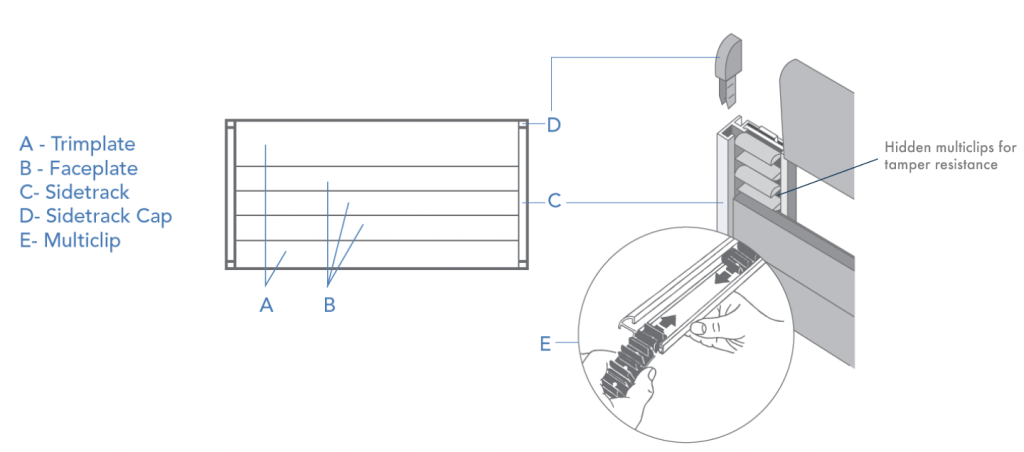
At the heart of a multi-panel Slatz sign is the multiclip. Inserted into aluminum sidetracks,
multiclips hold multiple faceplates in limitless combinations to form everything from basic
wall directional signs to complex directories and displays.
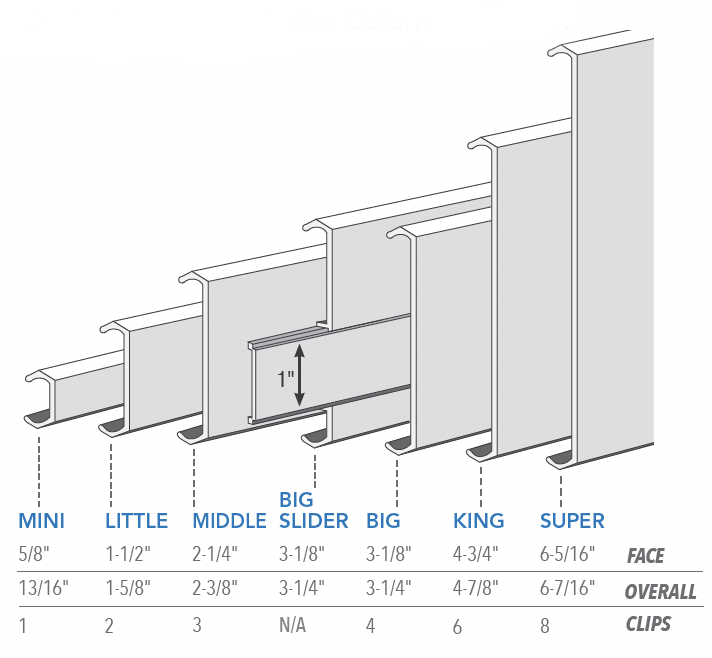
FACEPLATES
For Types A & B
Faceplates are precision-engineered aluminum extrusions. Available in
a silver satin finish or many shades from our exclusive Colorfix™ system.
TRIMPLATES
For Type B
Trimplates are similar in construction to faceplates except for a return on one edge.
The return provides a flush wall mount and inhibits vandalism.
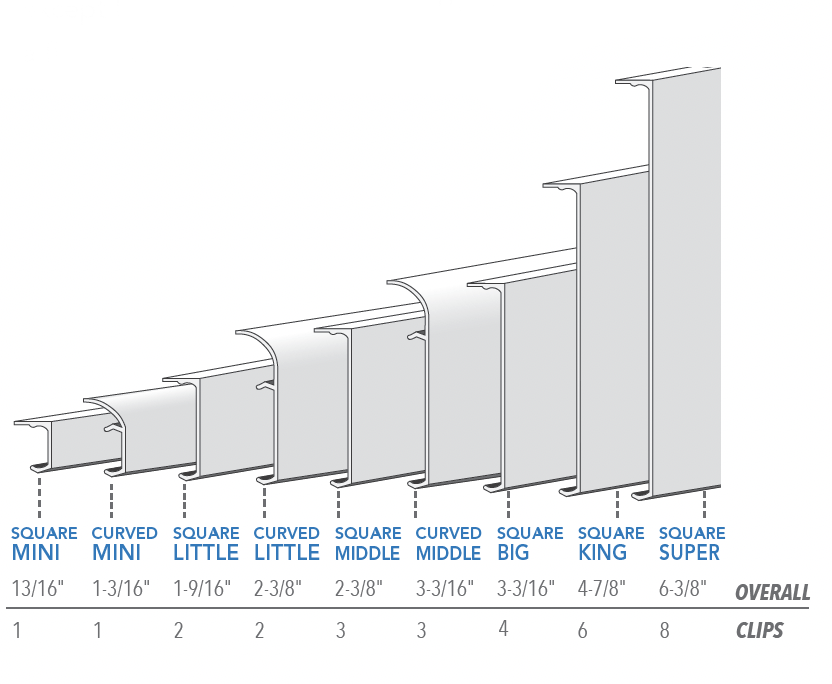
FRAMING OPTIONS
Framing options require two selections: trimplate and sidetrack.

Wall/Door Signs
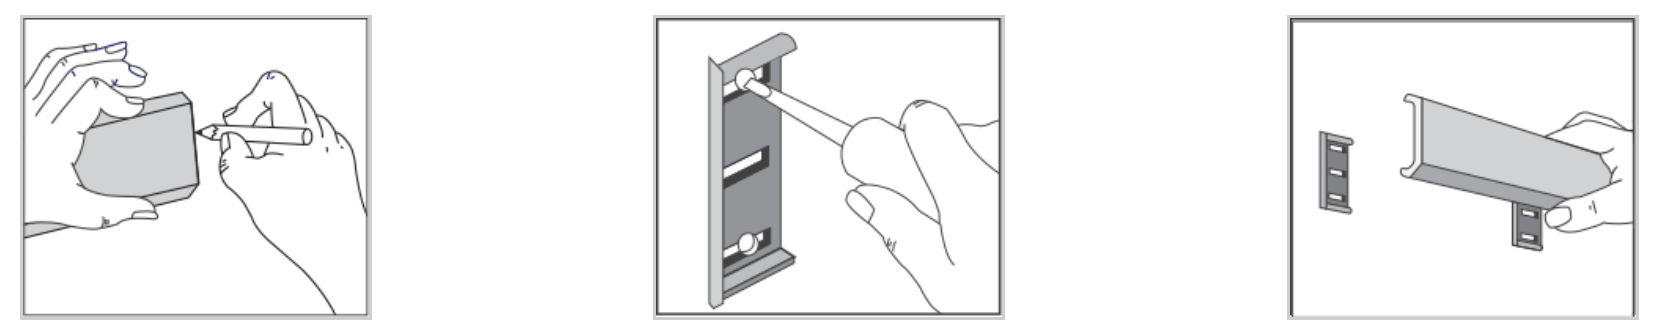
Hold plate on wall at desired location. Mark sides and corners. Remove end caps. Hold caps to corner markings and mark end cap mounting holes. Drill holes, insert anchors, and fasten caps to wall. Do not fasten tightly; allow for minor adjustment. Snap faceplate into place.
Single-Column Directories

Remove plates, where shown, to expose mounting holes. For taller directories, check the tracks for additional holes. Position on mounting surface, level, and mark holes. Drill holes in wall where indicated and insert anchors. Line directory up to holes and fasten with screws. Replace plates.
Multi-Column Directories

Remove plates, where shown, to expose mounting holes. Position on mounting surface, level, and mark holes. Drill holes in wall and insert anchors. Line directory up to holes and fasten with screws. Replace plates.
Flush-Mount Ceiling Directories
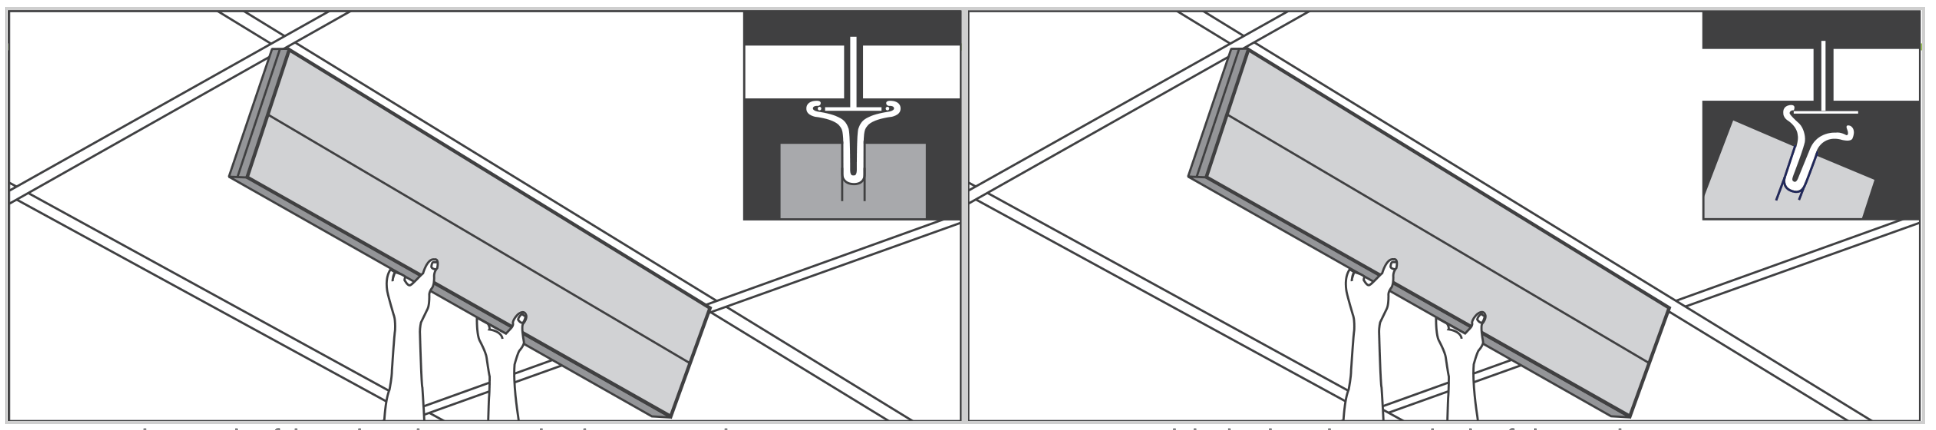
Hook one side of the ceiling clips to metal ceiling strip as shown in inset.
Finish by hooking the second side of clips as shown in inset.